Showing posts with label baby gifts. Show all posts

Friday, September 30, 2011

Handmade Holiday Market

Awhile back my friend Mary Jo from 517creations facebooked me about having a little holiday market sale (doesn't that sound so much more fancy than craft show?).  I said yes immediately, especially since it's going to be at her good friend's home (nice and intimate) AND that it would be free (YAY, free!).  
So, I'm just getting excited to have a day to showcase (and hopefully sell) lots of handmade creations.  It's always nice to have a little extra Christmas cash.  

The Handmade Holiday Market will be Friday November 11th from 6-8pm and Saturday November 12th from 9-noon.
Go and "like" it on facebook and stay up-to-date on other vendors and what all you'll be able to shop for that weekend.  


Pssst........it'll be a great place to find Christmas ties for your little man.  

Wednesday, September 28, 2011

Sewing galore

The one where I play catch up and post a million nine pictures of recently completed projects.

You've been warned. 


Tuesday, July 12, 2011

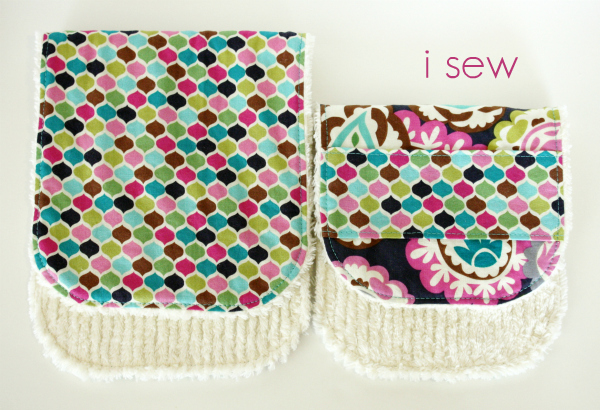
For Mia {burp cloth set}

Recently finished this custom for an old friend from high school. 


I know I haven't posted much sewing lately, but I am keeping busy.  I blame it on the fact that summer is in full swing and we are BUSY (less time to organize and write a blog post).  I will have several more customs to post in the next few days so stay tuned.  AND, I am working on a post about all our Fourth of July festivities, better late than never. Right? Right. 
See ya on the flip side. 

Friday, June 10, 2011

Big Bro Appliqued Shirt

For a soon to be Big Bro (No, not my Lincoln)
Confession:  I had to rip off the pocket of this tee.  It's Garanimals from The Mart, and had a pocket on it.  I couldn't figure out how to deal w/ it design wise, so I ripped off the pocket.  Ah!  Pocket-less tee, much easier to work with.
And if anyone would like to fund the purchase of a Silhouette for me so I don't have to hand cut-out letters that'd be great. M' Kay, thanks ;)

Linking to: WhipperBerry ~ Tatertots and Jello

Wednesday, June 8, 2011

A Whole Girly Gift Set

This set has been done awhile, but I'm just now getting pics edited and posted to show.  Life has been a little chaotic lately, but now that it's summer hopefully things will slow down a bit.  YEAH RIGHT!!  
My SIL had me do a whole girly gift set for a friend that just gave birth.  I love this fabric!!  I don't love that Hobby Lobby doesn't have their prints named.  What do I call this??  Since the little girl's name is Lillian, these prints will be named after her.
On with the show. 
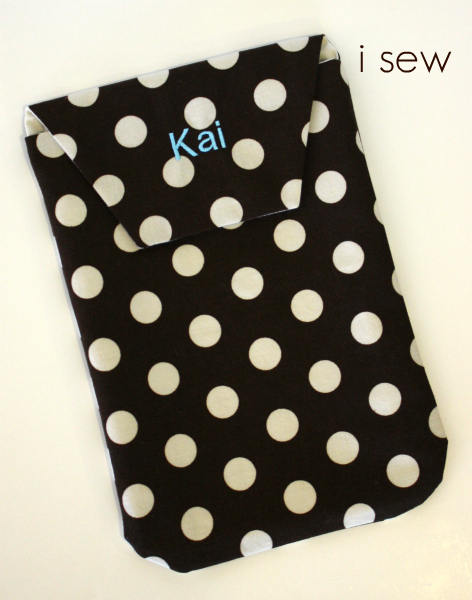
Lillian diaper case 
Lillian bib
Lillian burp cloth set
Burp cloth detail
Lillian pacifier clip
And last but not least, a receiving blanket.


Thanks for subscribing!

Thursday, May 5, 2011

Chartreuse {my favorite green}

After Orange, Chartreuse is probably my favorite color.  I just love it!  In my opinion its the perfect shade of green.  As Fancy Nancy would say 'chartreuse is fancy for yellow-green.'  I found this chartreuse print at Hobby the other day and had to have it.  
Chartreuse + Mocha = Marriage made in heaven.
Complete gift set I made for a previous giveaway over on my facebook page
 Burpies Set
Bib
Diaper Case lined in coordinating Dots
I'm thinking a new camera strap is in order for me.  I've also got a new skirt for Brooke in mind for this fabric.  Oh yeah, and some kind of teacher appreciation gift for Mason's teacher.  I'm sure just like any other fabric does after a while, it will lose its luster.  But for now, I'm in love.

Linking to:

Tuesday, December 7, 2010

Zipper Christmas Tree {tutorial}

Cute, Easy, Cheap.  My kind of project!

What you'll need:
  • Dollar store bib (or this would also look great on a onesies or shirt)
  • Steam A Seam (my is lite but regular would be better, I picked up lite by accident.  Heat n Bond would also work. Whichever you've got on hand)
  • Scrap fabrics
  • Zipper
Unzip zipper and cut into several pieces depending on how big you want your tree.  Mine were about 3 inches, some smaller cause you'll be trimming it into a tree shape.

Cut your scrap fabric a little larger than your zipper pieces.  Place a Steam a Seam piece next, then arrange your zipper pieces overlapping just slightly.  Now go gently iron the zippers in place.  
Now trim your tree shape.
Place another piece of Steam a Seam on the back of the tree, trim excess.  Position this on your bib, iron in place.  (I chose to do a small tree trunk out of brown, but that is totally optional.)
Sew around the edge of your tree and you're done.  You could actually skip this step and just be done, but I didn't feel my zippers were quite secure enough (probably cause of my Steam a Seam Lite).  
It's SO festive.  I love the texture!!  And even though Mr. Lincoln is not exactly eating food and in need of a bib, he will still look so cute in this.

Monday, November 8, 2010

Best New Mom Gift Ever

I know every blog out there has done giveaways for hand stamped jewelry, well this isn't a giveaway, but rather a BRAG on my good friend, Jackie.  In August she started up Nella Anne Designs.  For my shower gift she made me this beautiful necklace.  I absolutely LOVE it!!  
I think it's the best mom gift every!!  She does great work, and she's been busy making necklaces for almost all of our friends.  One friend had her do a set of three necklaces, one for her, one for her (adopted) daughter and one for the birth mom.  So sweet!  And she does bows too!  Check her out, Nella Anne Designs, she's also on facebook and does specials for followers.  

*Note: She's taking a little maternity break till mid-November.  She welcomed baby #4 on November 4th.  You can still order, but orders won't be processed till she's officially back.  You can contact her through her website or facebook page.

Tuesday, October 26, 2010

Zippered Pouch~Wetbag

Mr. Lincoln needed a wetbag for all his dirty diapers, he couldn't be forced to use sis's flowery pink one any longer.
Instead of embroidering his name on it, I just appliquéd it.  Brown and orange is my favorite color combo, probably even more so in the fall.
Inside it is lined in PUL.  Keeps the rest of my diaper bag dry.
He can rest easy knowing that the other babies won't be making fun of his pink wetbag anymore.  Now I just need to re-dye the prefolds some manly colors.  Currently they are pink and purple, not quite manly. 
Linking to:

Wednesday, September 29, 2010

Nursing Pads {tutorial}

We are cloth diaper people around here.  Since I'm saving tons of money using cloth on my kids I figure why not save more money by not having to buy nursing pads all the time.  I would have gone through BOXES and BOXES of throw aways with Brooke who I nursed 13 months, but thankfully I had my homemade ones.  Nursing pads really are some of the easiest things you can sew for yourself to save $$.  And in my opinion they are way better than any store bought reusable pads.  And you can make them cute.
What you need:
  • For absorbency, I use flannel (old receiving blankets even), you can also use terry cloth, even microfiber towels if you want.
  • For backing (water-proof barrier), fleece.  You can also use 100% wool, felted.
  • For topping (layer facing skin), flannel, knit, or cotton woven, your choice.  I use flannel just cause it adds another layer of absorbency. 
  • Sewing machine, and something round to use as a pattern.  I use a trusting old Eskimo Joe's cup since we have about 15 in our cupboard. 
  
  Start by cutting your circles.  Again, my pads are made with one layer fleece (water-proof barrier), two hidden layers of flannel (absorbency) and topped with cute flannel.  
*On a side note sorry about the inconsistent coloring of these pics, they were taking at several different times of day and locations
 Now, stack up and pin your circles.  Then cut a notch out, this is so we can make the pads contoured for better "fit."
Then sew around the whole pad and on both sides of the notch.  I use my overcast stitch to prevent fraying of the flannel.  If your machine doesn't have an overcast stitch option, just zigzag it.  
Now you'll pull in your notch crossing one side over the other slightly.  If you need to, pin it.  Then go and sew a straight stitch following the edges of the notch to join it together.
 Your straight stitch will end up being a very narrow triangle.  You can see the left side of my triangle here.
And with that, you're DONE.  Easy Peasy!!
Be excited that you'll be saving $$ through out your nursing career.
Only about 10 more days till my new nursling arrives!

Linking to:

Monday, August 2, 2010

Amelia & Eva Diaper Cases

More new babies at church.  Our nursery is overflowing.
Lined in cream
Lined in pink

Sunday, June 27, 2010

Some New Diaper Cases


I'm still alive.  Just haven't been blogging much, obviously.  But I have still been sewing.  I finished up four diaper cases for church.  (We have tons of babies at our church!)

Altogether
And for your viewing pleasure, a pic of the ever growing bump.  Taken last week @ 24 weeks.
Stay tuned for a post about Brooke's new skirt and top I made.
Related Posts with Thumbnails