Monday, August 31, 2009

Shirt to Toddler Ruffle Dress Tutorial

So I thought Little Miss needed something to wear for the big game this weekend. And by big game I mean Oklahoma State v. Georgia. (Go Pokes!) Or if you're not a big OSU fan, you could make a similar dress for Halloween. Little Miss will probably wear this all fall, just layered with a long sleeve tee.

I've loved Jessica's T-Shirt to Toddler Dress Refashion and so this is my version. Some notes, the ruffles on the neck and hem were pieced together. I used material from a repurposed shirt sleeve so they weren't quite the length I needed. Use what you've got. If you plan on using one long piece you'll need about double the length to get the correct ruffle length. Make sense?? So say my neck and shoulder measurement was about 20 inches, I would cut a strip of fabric about 40 inches to ruffle. And longer is always better cause you can just trim what you don't need.

**don't forget click pics to enlarge**


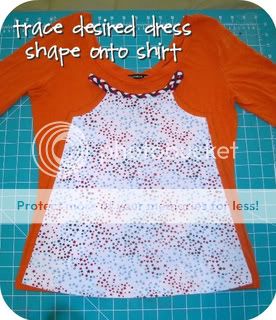
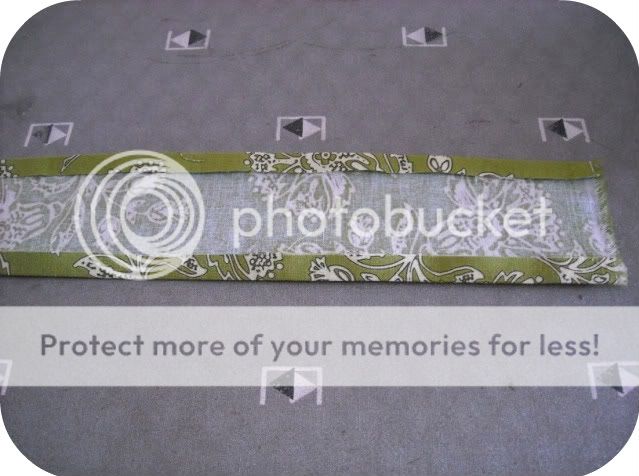
Make your ruffles. More info here. Just remember long stitch length, high tension and sew. Refer back to my original dress, the straps came out from the armholes, not straight up from the neck. So place your ruffles accordingly.


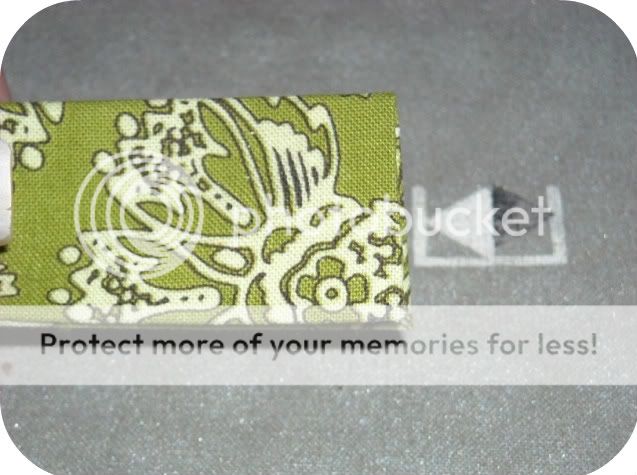
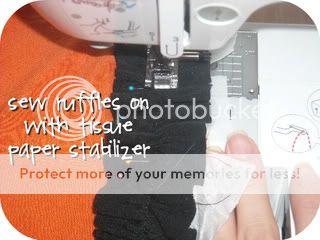
In my last ruffle refashion, I used sticky back tear away stabilizer to help my knit from stretching out while sewing. **TIP: I used tissue paper this time. It's way cheaper than tear away stabilizer, and I've always got loads of used tissue paper laying around from birthday presents. I've used tissue paper before when sewing satin, to help it from sliding so much. So thought I'd try it again. It worked great! Just cut strips about two inches wide and place under where you're sewing your ruffle in place.


Little Miss modeling her new ruffle dress. And her new bow I made :).

Happy Sewing!

Wednesday, August 26, 2009

Future Project Highlight

I saw probably 3 or 4 headboards for sale when I was garage saleing this weekend. I didn't need one and didn't buy one. But today I say this in my reader, Headboard turned Coat Rack. Maybe I'll have to pick on up next time I go out so I can do this super cute project. The Mr. is always saying he wants a coat rack, but I don't really know where in our house one would put one. Problem solved. Hang it on the wall. Great idea CG! If you haven't checked out her website, do so. She's full of awesome repurpose ideas. Here's another headboard repurpose she did. I love this one too.

Monday, August 24, 2009

Ruffle Tank Refashion

So I did it. I made a ruffled tank. And it was SUPER easy! Here's what I did.

Painstakingly took off all the sequins. Honestly this is what took the longest.

Make ruffles. I found a jersey knit top in my closet that I only wore around the house and cut away. I did 1.5 inch strips, just the length of the top. No real rhyme or reason to length, just went with it. I never would have thought ruffles would be "sew" ;) easy to do, but they were. Set machine to your longest thread length and highest tension setting. And sew, it's that easy. I was amazed! I know I'm easily excited. Pile of beautiful ruffles. I only used three for this project so I'll have figure out what to do with the extras.

Pin ruffles in place on shirt. I wanted kinda of a staggered look, which I'm going to have to fix because I didn't do it dramatic enough. The shorter two just look uneven, not the effect I was going for. **TIP: I put some sticky back, tearaway stabilizer on the back of the tank where I was sewing the ruffles. That way the shirt wasn't trying to stretch out on me as I sewed.

Take out pins and clip threads and you're done. Easy Peasy! Just in case you forgot, the before.

Saturday, August 22, 2009

Capes, Capes and More Capes

I've been sewing super capes. A LOT of them. I think I figured that I've sewn about 20 since June. That's a TON. But the other day I got to sew one for Little Miss. It was Super Hero Day at our beloved Chick-fil-a last week. The Monster already had a cape, and I made him some super hero wrist bands to go with it. But Little Miss needed a super girly cape to wear so she could get free food too. (I love free food!) It turned out so darn cute. I've made a couple before, and four more since, but hers is special. I used the white sparkley felt AND added some sequins to the points on her crown. She's got *Bling* ;) I also used the satin to make her neck band instead of the cotton like I normally do. Check her out.

The Monster's friend must have been telling him a story, look at that hand action.

Monster getting his pic taken with Spiderman outside. Like his shirt? It's mama made :)

Another cape of mine. His friend R decided to wear a different Super Man costume he got at a yard sale, so his sis got to wear his cape. Their mom joked that sis looked like 80's aerobics instructor hero. She had on a bodysuit, leggings, and a headband around her waist, AND the boots. Too funny!

And me and Little Miss. Unfortunately she wouldn't really cooperate for a pic (what 19 month old does?). But you can see the bling on her cape in this pic. We had tons of FUN!!

BTW, Recognize my headband?

Garage Sale Finds

This weekend we had a garage sale at some friend's. She and I worked it yesterday morning and then somehow managed to get her husband to man it this morning so we could go garage sale shopping. He's a good man, he even stayed home with her little ones. (WOW) So off we went. I didn't find much considering I was looking for boys 4T stuff for The Monster.
I spent $4.25 and this was my haul:
-pink lawn mower for Little Miss (pretty sure she's going to have to fight Monster for that everyday)-$1
-Bob the Builder backpack-25 cents
-two practically new Old Navy tanks with embellishments (more on these later)-$2
MY BIG SCORE
-Steve Madden black leather dress boots-$1, yeah I said $1
And the lady I bought the tanks from threw in a pair of Batman shades for The Monster.

So about the tanks, one is turquoise and has sequins and beading around the neck. Super cute! I'm going to wear it with a white, cropped, short-sleeved, feather weight jacket. The other is a fushia color with gold sequins around the neck. If you know me you know I'm not really into gold. So I think I'm going to take those off and refashion it. I'm trying to decide if I want to do the corsage tee, like this or this. I like the fullness of the latter, how about you? Or do a ruffle tee. Hmmm?? Anyways, here's the before of the tank. Hopefully I'll get an "after" complete today.


Wednesday, August 19, 2009

10 Minute Fabric Headband Tutorial

Ok, so in reality this didn't take me 10 minutes. But it would have, had I tried to accomplish it while my kids were sleeping.

Materials:
17.5 inches of scrap fabric (mine was 2.5 inches wide, but you can adjust to your liking)
4.5 inches elastic
thread, scissors, pins, yada, yada, yada

1. Fold in and iron long edges 1/4". Note** This is the lazy-woman's headband. You could pin your pieces right sides together, stitch and turn-n-topstitch. But turning is SUCH a pain, so we're going to fake it.

2. Fold in half lengthwise and iron. Fold in short edges 1/4" and snip corners.

Iron over again to get a crisp edge. I like to also pin the long edge. (Pins are my FRIENDS-except when kids finds them on the floor.)

3. Head to the machine. Sew as 1/8" seam down long side. Be carefully not to sew over our pin-friends, that's how needles break. When done with that side, sew down the other long side. Just like you would if you had turned-n-topstitched it. But with a lot less work :)

4. Pin elastic about 3/4" in, into short the end.
5. Sew about 1/8" from edge. Move headband over 1/8" and sew another line, for extra security and staying power. Repeat on other end.
6. Model your new fab headband!

Sunday, August 16, 2009

Another First :)

It's my first refashion. I very loosely based this refashion on this tutorial. Love the checks, wish I had a checks shirt to refashion. But since I was a virgin "refashioner" I started with this ho-hum gray top. I think it was given to me from a lady I used to work with. It's ok, just not anything fabulous. I thinks it better now and I'll at least wear it more. So here's the before. As always, click to enlarge.

I wish I would have got better pics on the arms. They were 3/4 length, with a wide cuff-almost 4 inches. I cut the arms and collar off, I just free-handed it.

I cut the cuffs off the sleeves and trimmed them to about 2.5 inches. Then I pleated them a little and made them into my new neckline. Finished off the back of the tank and armholes. BTW, before I did all this I took in the armholes a bit. They were a little gaping as a tank, so I just took in at the shoulder. And modeling ;) Sorry for the horrible blurry pic. Next time I wear it I'll try to get the Mr. to take a better pic.

What I'd do different?? Next time I think I'll start by finishing off the armholes and back neckline. But all-in-all I think it's pretty cute.


post signature

Wednesday, August 5, 2009

Creating a Schedule and Meal Plan with Google Calendar

My FIRST tutorial! I'm so excited, but bear with me :) Simple Mom had a recent entry about creating a routine. I took that info and used it to form my own routine and also incorporated a meal plan. So here's how I use Google Calendar to stay organized. P.S. Click pics to enlarge and zoom :)

1. If you haven't already go to Google and sign up for a Gmail account. You will use this account to login and create your calendar.

2. When you login you'll see your blank calendar. From here you can start creating events. Here is a picture of my calendar (I have all four of my calendars showing). My default calendar is the blue, this is where I list actual events, times we'll be gone, play dates, etc. My Meal Plan calendar is turquoise. The kids basic schedule is in orangy-mustard color. The "Mom" schedule is in reddish-brick color.
3. To create an event click on the calendar during the time you want the event. A box will pop up, if you simply want the name of event and that time fill it in and click 'Create Event'. Or to add more info to your event or make it repeating click 'edit event detail' This screen will appear. Here is me creating an event for my Meal Plan Calendar. For my Meal Plan Calendar I enter the name of the meal, select "All Day', repeats weekly, every three weeks. Make sure you select the correct calendar you want it listed on. See I have chosen "Meal Plan" I also use the Description section to list the complete meal, like what sides or other items we'll be having that night. I also use the email reminder option (which I LOVE).
4. Here is the handing email that gets sent straight to my ipod and reminds me what we're having for dinner.

5. To create more calendars click 'create' in the My Calendars section. This is also where you can select or de-select the calendars to choose which ones you want to view. Below I have selected my default calendar and my Meal Plan calendar. You my also change the color of what your events are in a specific calendar by clicking the drop-down next to that calendar name. A color selection chart will pop-out, it will also include the Calendar settings link and a few other options.
I hope this was helpful for you. I print out weekly calendars with the Meal Plan and default calendar (blue one) shown. That way I can see at a glance what we're eating and what we're doing.
Related Posts with Thumbnails